2000 Larson 186 LXi Project

Bayou Dave

Lieutenant Commander
Joined
Dec 13, 2012
Messages
1,780
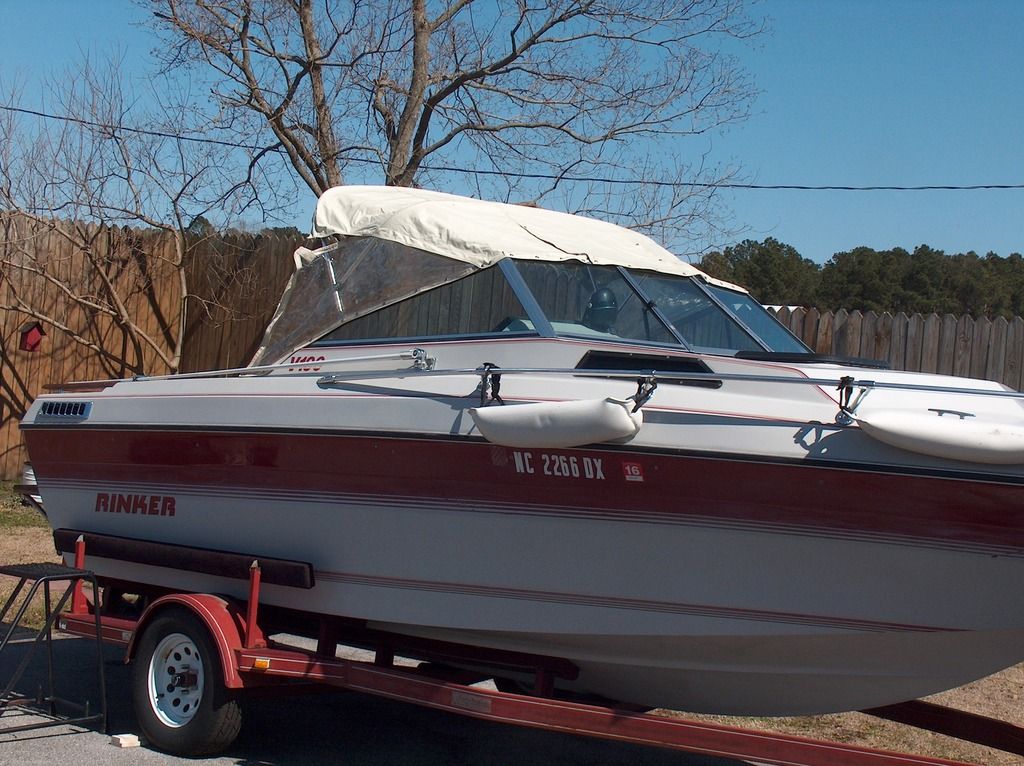
Those snaps are for a convetible top. It only covers the front seats and dash area and is very low This is one on my old boat.
Convertible%20top_zps22zlhsik.jpg


The bimini on mine attaches on the frame part way towards the stern. The bimini is bolted to the frame and then the straps go to the stern and bow. I don't have a pic of that.
 

Bayou Dave

Lieutenant Commander
Joined
Dec 13, 2012
Messages
1,780
On your boat I don't think where the flat part of the pedestal is makes any difference.
 

Sunken Ship

Petty Officer 1st Class
Joined
Jun 19, 2014
Messages
252
Thanks Dave! That makes perfect sense on the top. I think I will go with Bimini. I really have to keep the sun off.

The ski locker door was hitting the seats before, so I wanted to make sure they were over far enough when I reinstalled them. Didn't pay much attention when I put them back in. Oh well....might switch them around one day.
 

Sunken Ship

Petty Officer 1st Class
Joined
Jun 19, 2014
Messages
252
I have put this off as long as I can due to cost. What do you guys think is the best way to fix this prop? Every blade on it is bent at the tip. I can buy a new one with the hub kit for around $140. I read on here the other day that these can be fixed for about half the cost of a new one. Although, I believe that thread was rather dated. Also, found a prop for $100, but it says it is for a Yamaha Suzuki. Doubting this will work on a Volvo Penta I/O, but this is my first I/O so I don't really know much.

The propeller is a Solas 14.5x19. Not sure if the PO even put the correct pitch/size on the boat. What do you guys think about the pitch/size that is currently on it? I would be most interested in the factory correct prop for general use.

Greatly appreciate all the help and suggestions everyone.

Here are the three blades:


.
 
Last edited:

Woodonglass

Supreme Mariner
Joined
Dec 29, 2009
Messages
25,924
Vice grips and a couple of hammers should get the job done. Use the VG to grab and bend the bent areas back to the original angle as best you can. then use one hammer as a 'Backer' and start tapping the edge to refine the shape. Prime with Self Etching primer then shoot some black on it and it'll perform like new. Take your time and try to get it as smooth as possible.
 

Sunken Ship

Petty Officer 1st Class
Joined
Jun 19, 2014
Messages
252
I like your thinking WOG. Guess I can't hurt it too much. I have a body hammer set and a dolly. Will give the prop a good beating soon.

LOL...it is fugly, but she moved the boat along pretty good. Wondering if I will get any more top-end out of her after I straighten it out?

Told my Daughter we are going fishing tomorrow. She BEGGED "PUUUUHHHLEEEAASSEE DAD" to take the boat. Sure can't wait to get it all going, so I can say yes. Really enjoy fishing from a kayak though.

Today I worked on the ski locker door. Now that the wood has dried out for almost two months it is showing some damage from all the water over the years. The hinge for the ski locker and door strut mount needed some attention. I took some fiberglass cloth and resin to strengthen these areas.


The mounts were rusted up rather badly, so I put them in the sand blasting cabinet:


And a shot of paint (no time for primer) lol :


I took the old gas strut to the parts store and found one for $16.xx. Works perfect. Hope it lasts:


What's next...?
 
Last edited:

Sunken Ship

Petty Officer 1st Class
Joined
Jun 19, 2014
Messages
252
We enjoyed another day out on the lake. Only had one problem with the trim not raising for a few minutes.Boat fixed itself-gotta love that kind of boat! Sure it will come back again in the future. Really need to get a bimini top for this soon.

Had a really good discussion on sewing machines and marine upholstery after we hi-jacked Woody's thread. If you are trying to figure out a the proper sewing machine for this kind of work check it out here-very informative: http://forums.iboats.com/forum/boat-...upholstery-job . I am pretty certain my machine won't do this kind of work, but I am going to give it a shot anyway. Guys here have done some really nice work with just a home machine, although they are not ideal.

Below are a couple photos of the first panel taken apart. I wanted to take this one apart first because it is smaller and represents most of the other panels. At the moment I am waiting on samples from an online marine vinyl supplier. Hopefully I can have the interior completed by next spring.
 
Last edited:

Bayou Dave

Lieutenant Commander
Joined
Dec 13, 2012
Messages
1,780
Didn't realize the upholstery has 3 different colors. You going to try to match that?
 

Sunken Ship

Petty Officer 1st Class
Joined
Jun 19, 2014
Messages
252
I found two different maroons, gold welt, cream/off-white, grey, and tan. I will TRY to come really close, but I am not too optimistic. If the final result is an improvement then it will be regarded as a success.
 
Last edited:

JASinIL2006

Vice Admiral
Joined
Feb 10, 2012
Messages
5,545
How did you remove those bolster pads from your Larson? I have a '97 Larson 186 SEI that needs to have the front end reupholstered. Whether I try to learn to sew or have someone else do it, I still have to remove those panels. Was it very difficult?
 

Sunken Ship

Petty Officer 1st Class
Joined
Jun 19, 2014
Messages
252
Look under the dash and glovebox for screws that go into these pieces-reference red arrows in image. Screws go into these plastic pieces (not made out of wood) -see red arrows. Fronts are held in by plastic fittings like a door panel on a car- see yellow arrows. So just pull away from the hull/deck after removing the screws.

You might need to remove the carpeted kick panels (under dash and glove box) to get to the screws. I think it was either 3 or 5 screws. I ripped the carpet off the kick panels under the dash an glove box. So you might have a time finding the SS screws my red arrows reference.

I suspect doing the interior will be the hardest part of my boat project.

Hope this helps.

 
Last edited:

Sunken Ship

Petty Officer 1st Class
Joined
Jun 19, 2014
Messages
252
I picked this old machine up a couple days ago that WOG found in his thread ("another upholstery job"). Might grab a walking foot attachment and simply do the best I can with it for my boat. Also, mailed some samples off to a place in Alabama to see if I can get something very similar to the original colors and textures.

Threaded the machine and sewed two pieces of together without a problem. Was told it has been years since the machine was last used.


Machine was very complete. Still had the manual, attachments and some button holders.
 
Last edited:

Woodonglass

Supreme Mariner
Joined
Dec 29, 2009
Messages
25,924
Clean it and oil it with Genuine Singer Sewing Machine Oil. Most of the attachments you'll never use. The walking foot attachments don't work all that well on vinyl. If you were making a Quilt it would be GREAT!!!:eek: You'll use the zipper foot (That's the one with the slider and knob) and that's about it. Send me a PM if you need any knowledge on the machine. I can take a 15-91 apart and put it back together with my eyes closed.!!!!:nod: Did you get extra bobbins? It's nice to have about a dozen.
 

Sunken Ship

Petty Officer 1st Class
Joined
Jun 19, 2014
Messages
252
Woody, Sent you a PM. Appreciate the help getting this machine all setup for sewing. Taking forever to get samples! Being impatient I guess. I watched someone with a $10 Walking foot and they were having a lot of trouble with getting the material to feed through, kept hanging on the attachment. Oh well, I will just do my best with what I have.


Browsing the V/P section this morning and realized I forgot to set timing after the rebuild. :eek: Realized I have the pig tail from another project, so I made this:
 
Last edited:

Sunken Ship

Petty Officer 1st Class
Joined
Jun 19, 2014
Messages
252
I sent some of the vinyl samples (see below) out to a couple suppliers here in the US. There is a gold from the welt pipe that I did not include in the image below. I may have found that material- I think/hope it's "astro metllic quarry." Waiting on a sample of that too. Requested samples from a few other places already that didn't really match well. Also, went to a local auto upholstery shop here in town. I found the white and burgundy, but struck out on the other. Will continue to seek samples until satisfied. Then , hopefully, I can get the material here.

Bought 1850 yards of "army tan" thread that matches very closely to the original. Getting close to getting started, but interior is sure is a slow process for me. Just not setup for this kind of work. No worries though, my goal is to have it all done by next season.
 
Last edited:

Bayou Dave

Lieutenant Commander
Joined
Dec 13, 2012
Messages
1,780
Did you happen to ask Larson which manufacturer they used for vinyl?
 

Sunken Ship

Petty Officer 1st Class
Joined
Jun 19, 2014
Messages
252
No, I didn't think Larson would be too concerned with this old boat. The white and burgundy are still very popular colors and readily available, but the other two colors are almost impossible. Especially impossible when you ask for the texture of the samples of the material on the far right.
 

Sunken Ship

Petty Officer 1st Class
Joined
Jun 19, 2014
Messages
252
It has been slow lately, but I have been working on the interior as I can. Mainly, I have been trying to get the correct colors, since my goal is to restore to near original. Finally settled on the colors you see in the images below. I am pleased with them, but it took some serious patience (for me) mailing off clippings to three different companies then waiting for samples. Miami Corp. in Cincinnati, OH hooked me up here. When you try so hard to do something you greatly appreciate the help some others provide, regardless of how small it may seem.

Also, went ahead and got a 15-91 sewing machine that is doing a great job for only $60! Thanks for this suggestion Woody! Still working on exactly how to use it, but it is well worth the money!

I did get one panel completed today for the bow, but unable to staple it on because the foam needs repair. After the cover is stapled on I will really be able to check the seams. My research suggests the foam used is polyurethane, but I still do not know foam density. Anyone know? Hope to figure that out soon, so I can place an order for repairing here and there. Interior has numerous places that need repair. Need to calculate amount needed.
 
Last edited:
Top