Restoring Grandpa's 1965 Starcraft Eplorer

Mizedog

Cadet
Joined
Mar 8, 2016
Messages
10
Good morning all,
I am starting this thread for three reasons:
1. Document my thoughts, ideas, and plans to restore my dear Grandpa's (Edward Mitchell) boat
2. Humbly absorb suggestions and ideas from the wisdom of those here who know
3. Honor my Grandpa's planning, creativity and history of lake fishing

My Grandpa Mitchell bought this boat when I was just a year or so old and loved to remind me of that. I caught my first fish in the Kankakee River in Indiana from this boat using my first Zebco rod. Grandpa fished from this boat into his 90's, and the boat passed to my father, and now to me. I really want to fix it up so my two daughter's can learn the joy of fishing from me, and my father, and have a tangible thing to know their great grandfather by.

Thanks in advance for any help you all can provide. More to come!
 

kcassells

Fleet Admiral
Joined
Oct 16, 2012
Messages
8,598
Mize,
Welcome aboard Iboats! Guys here will chime in shortly to help git ya goin! Lots of great people here. First thing is to get pics, pics, pics to them so we can start to see whats to do. Lots of guys use it and have details how to post pics.
Nice passdown thru generations!
​KC
 

gm280

Supreme Mariner
Joined
Jun 26, 2011
Messages
14,591
:welcome: aboard Mize. Nice for you to join us...

Always nice to hear about the existence of a family boat handed down from generations. And the best reason to rebuild it back to like new. So post those pictures and let's see what you have and want to do. :thumb:
 

Mizedog

Cadet
Joined
Mar 8, 2016
Messages
10
Thanks kcassells and gm280. Pics are on the way. I took several of it's current condition. But first...
Here's a really blurry picture of my grandfather:


He was born in 1910 and spent his childhood in post-WW1 Germany. To escape the political and economic situation, he made the classic cargo ship ride to Ellis Island in New York at the age of 16, unable to speak any English at the time. He spent the next several years milking cows for a dairy in New Jersey, but eventually moved with his brother Leo to northern Indiana where they both got jobs working at a train car factory. Grandpa was the typical uneducated immigrant Depression survivor and took incredible care of everything he had. Hence, I'm a little ashamed at the current condition of his boat.
 

jbcurt00

Moderator
Staff member
Joined
Oct 25, 2011
Messages
24,863
:welcome: to you and your grandpa.

Good luck w your project, great to keep it in the family
 

Mizedog

Cadet
Joined
Mar 8, 2016
Messages
10
Here come some pictures. I don't have a side shot yet. Please keep in mind that Grandpa kept this thing in spotless shape, under shelter of a garage for decades. Since his move from Indiana to Colorado, it's seen a couple years stored outside. That means 15" of show at times, freeze/thaw cycles, and hale damage. I will be getting a good cover for this once I get some work done. I will probably move it to my garage during the work.

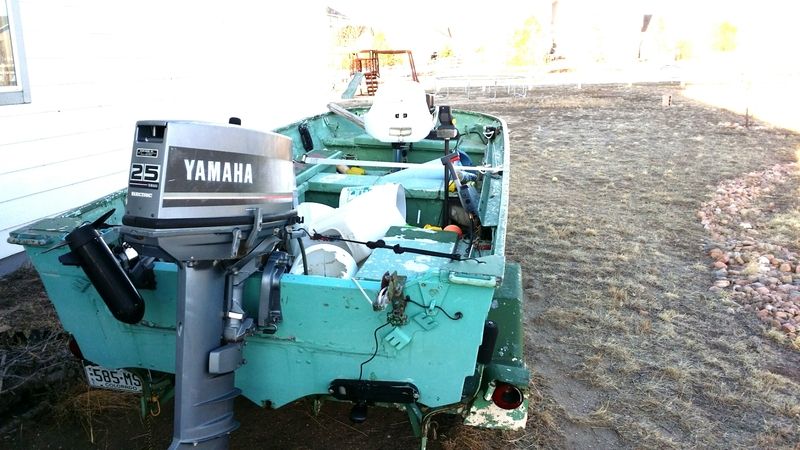
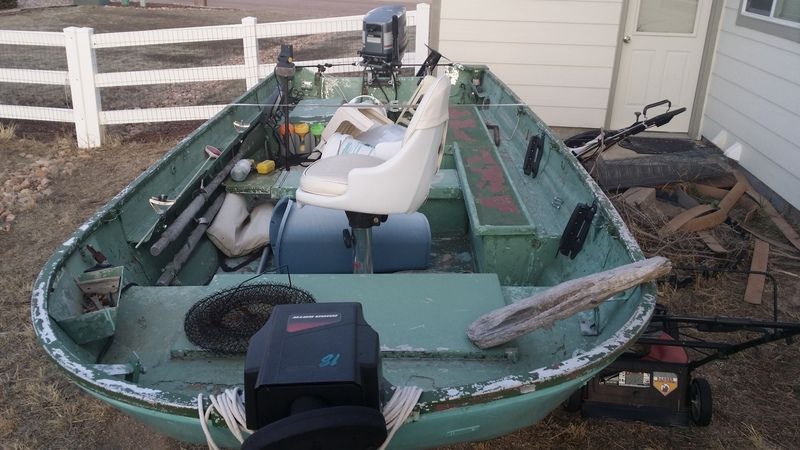
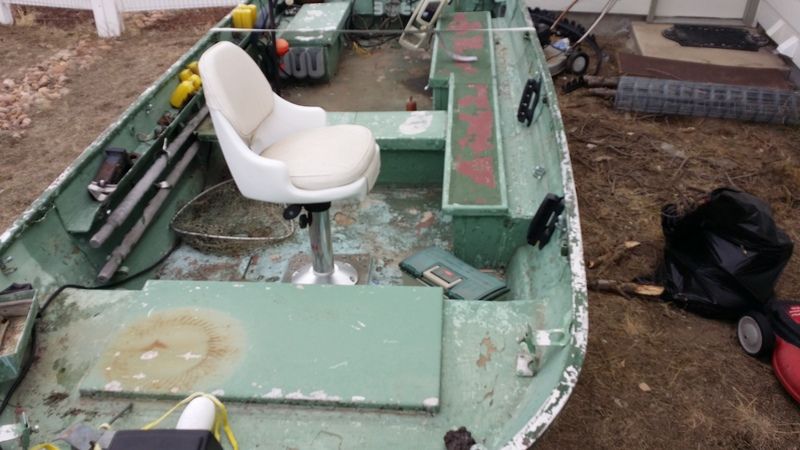
I believe this is a 1965 StarCraft Explorer (plain, utility version). Some pictures show a bunch of junk in there. It's all been cleaned out.


Not long after he bought the boat, the trailer axle failed while driving down the highway. The boat flew off the trailer, and the hull suffered major damage. Grandpa then went to work upgrading it. He was a welder for 37 years, and had machine shop experience which helped him build the cabinets.

Floor - appears to be glass over plywood
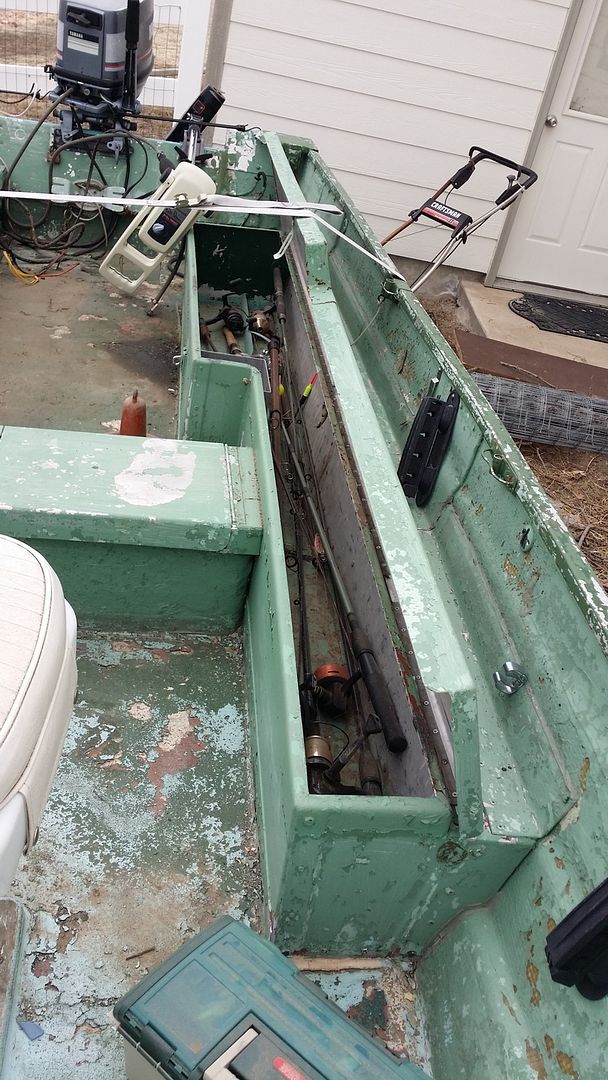
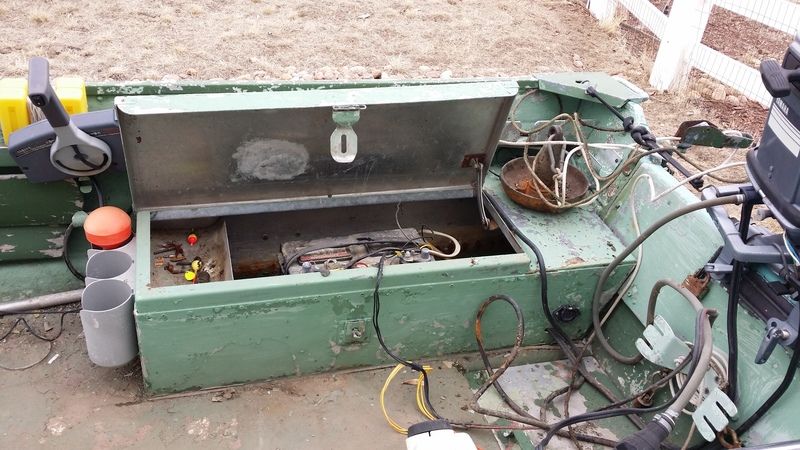
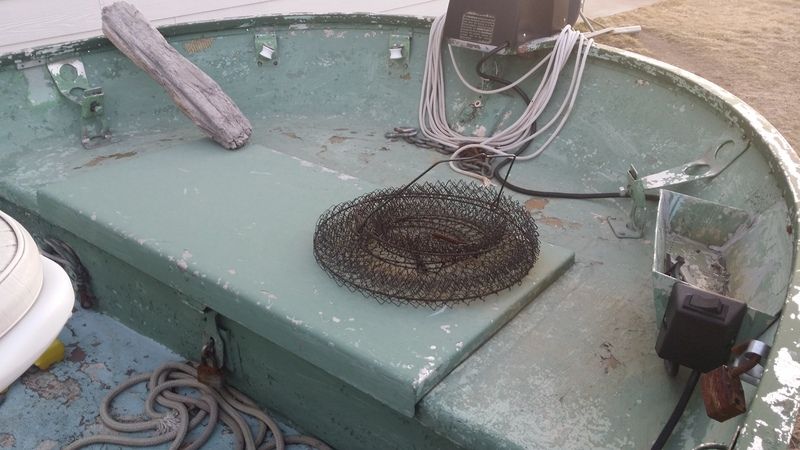
Cabinets - bow, side, and rear are all aluminum.


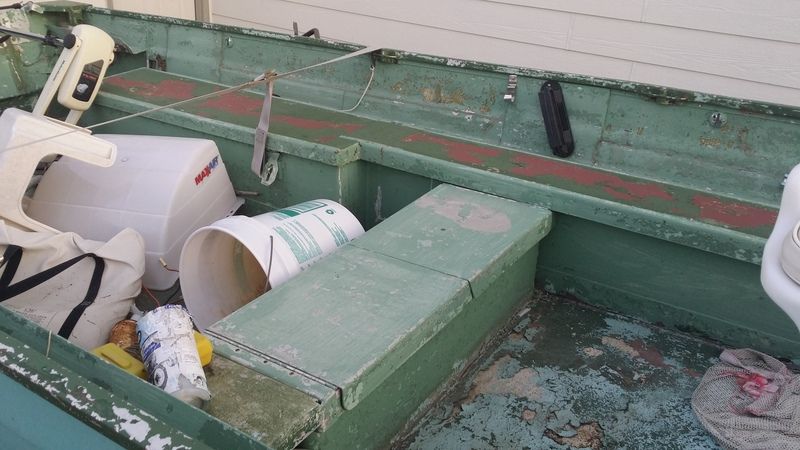
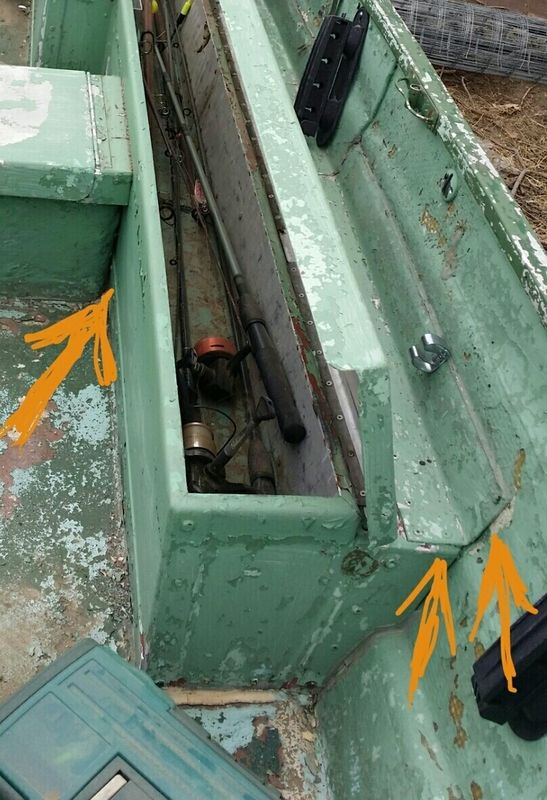
Rod cabinet/bench: (bonus: there are about seven rods there!)


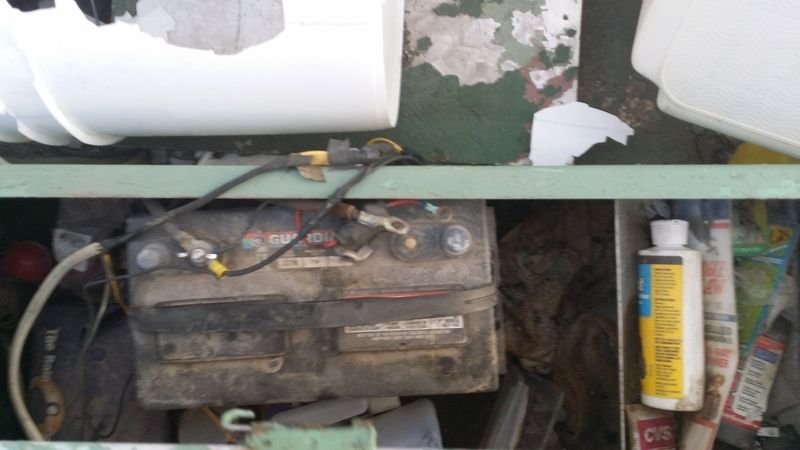
Battery cabinet:


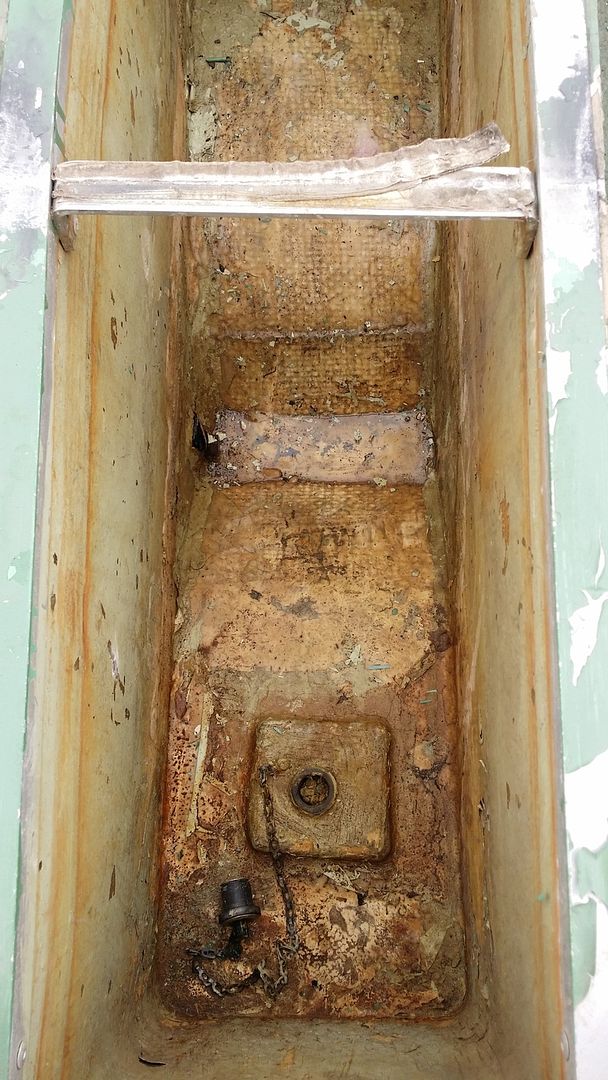
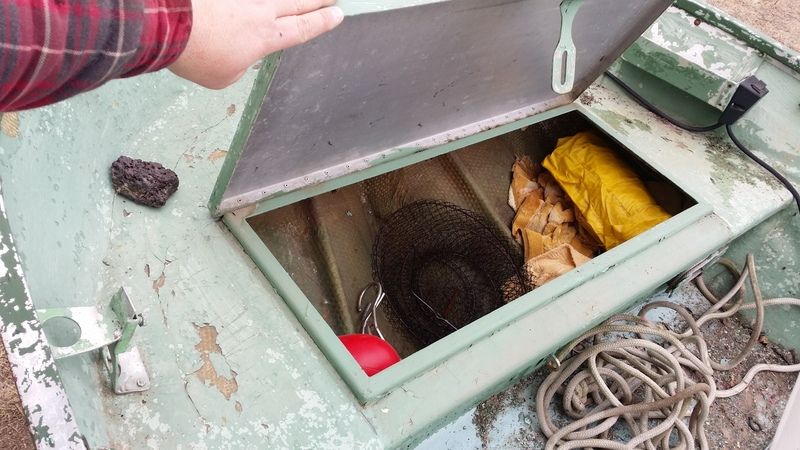
Livewell- this is a head scratcher. I know StarCraft put livewells in the Deluxe version, but they were on the centerline, rear. This boat has a livewell across the beam where the front bench would have been. The livewell goes all the way down to the hull, through the air-chamber/stingers.

From starboard side bow, lids closed (short, darker section lifts out):


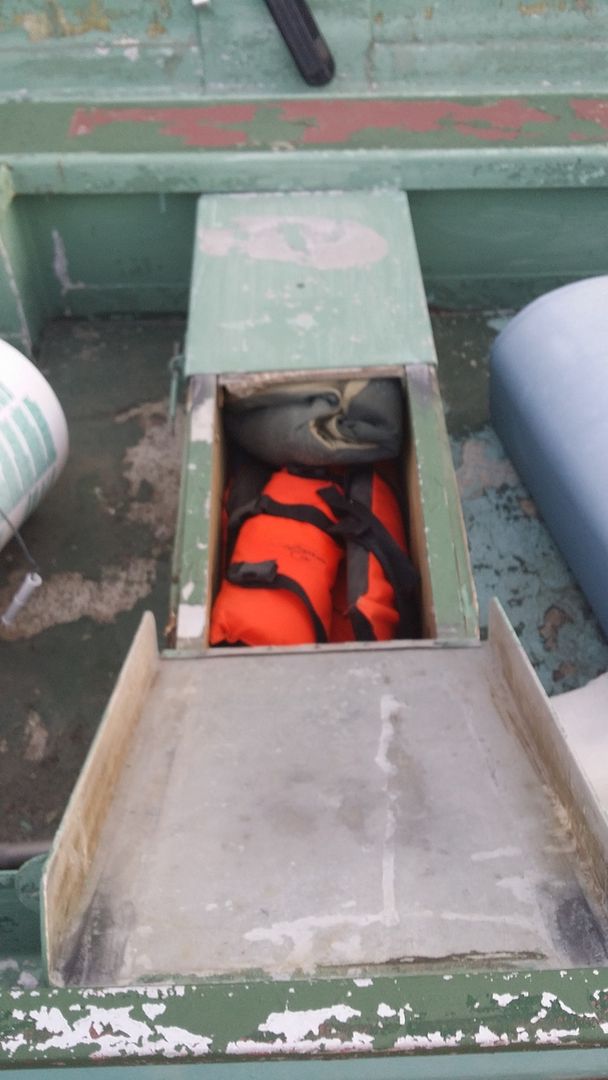
From starboard side, one lid open, filled with life vests:


From port side, lids open, looking down at plugged fill hole. Not sure what the front center drain hole is for, but suspect the bow cabinet drains into here. there appears to be some wood swelling here:


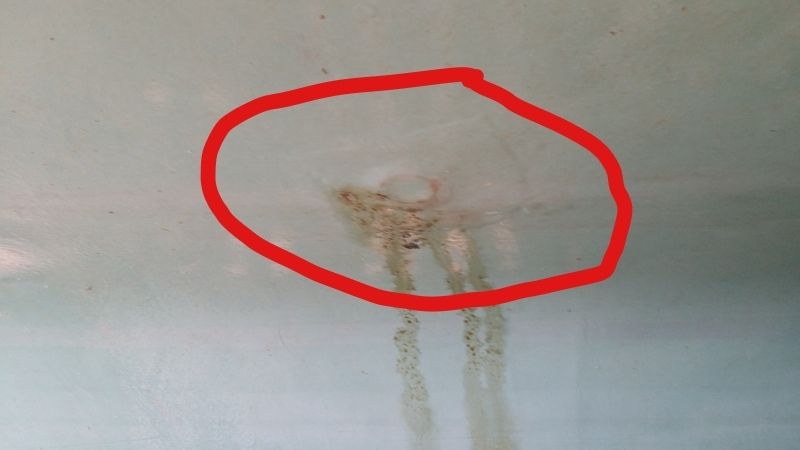
Shot of underside of hull of the deleted drain hole for livewell. It appears to be leaking. I'm not sure if this is from inside the live well, or from around the livewell. I think that if I were to redo the deletion, I would not want that ring protruding down, but would use a large patch of cloth, flush with the hull. Agree?
This is one of my first big problems to figure out:


Bow cabinet with aluminum lid (originally just a shelf, no foam in there. Top board is soft, but can stand on it):


Bow cabinet open:


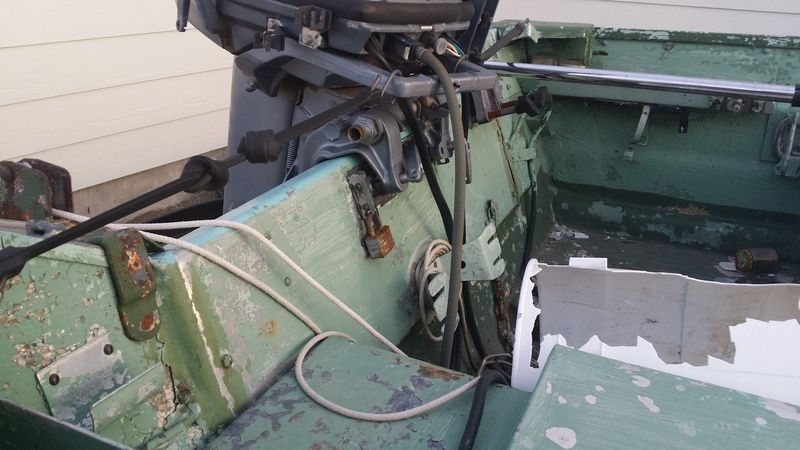
Transom pics. Dad said Grandpa used to have a 40 horse motor and built up the transom to handle it. Of course, it's solid as a rock but need cosmetic glass work. The transom is raise, and wrapped in heavy stainless steel (Grandpa LOVED stainless):

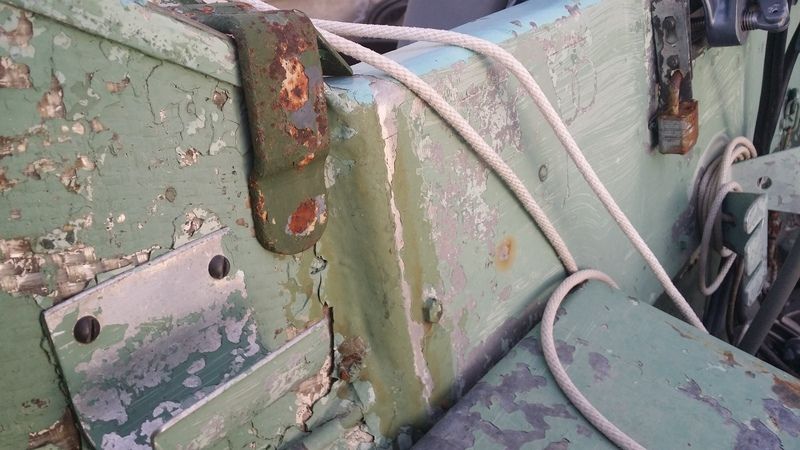
Inside, starboard side:


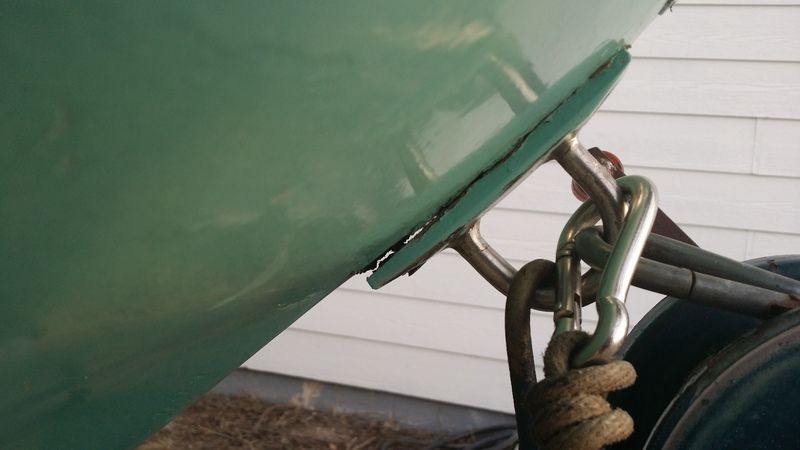
Rear, starboard side, bottom edge of the stainless steel extension plate. I appears that the original glass work has lost its adhesion. I imagine resin won't adhere to stainless steel well. Thoughts?


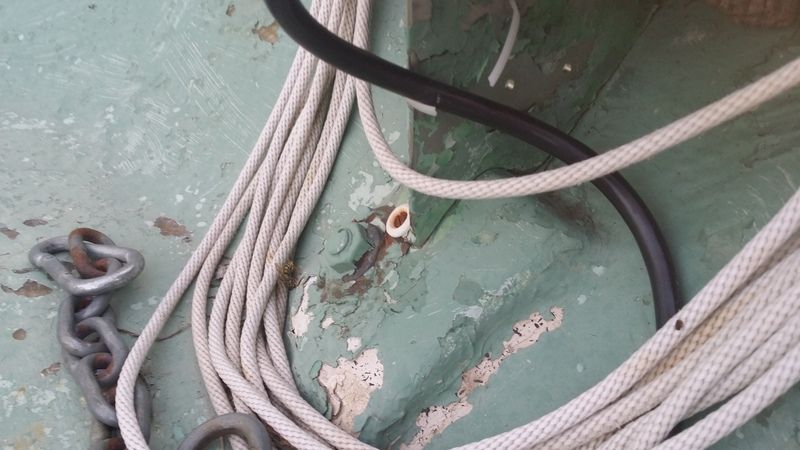
Bow attachment point needs to be reanchored:


Bow attachment point from inside:


So that's the overall condition. The hull seems strong but the inside needs work. The motor needs to go in for servicing since it's sat for several years without use. I'll add pics of some of Grandpa's little creations later.

Please let me know what you think. I believe I'll be ok to use it this season without replacing the deck as long as I take care of any water ingress areas in the hull first. Thoughts? Opinions? Suggestions? Techniques to use? Materials? Process map? Let me have it.
Thanks in advance for any insight you can provide.
 
Last edited:

Mizedog

Cadet
Joined
Mar 8, 2016
Messages
10
By the way, the paint is such awful shape mostly due to a severe hale storm that ruined the roof on my house. I didn't claim the boat. But you can see it was tough enough to break in the side of the 5 gallon bucket that was in there for minnows. All the pock marks in the paint are due to hale. It mostly came from the north (starboard) side so the inside of the port gunwhale was hit good, but the starboard side was more in the "shadow" of the hale.

Paint:
This is symbolic. As I mentioned, Grandpa worked for 37 years as a welder/ Sr. maintenance guy for a train car company. Those green colors are what the factory used. He would bring home extra paint and use it for his boat, and a hole bunch of other projects around the house from home made rain barrel/filters, to 25 foot tall bird house (more like hotel) stands, to bird bath (was 8 feet in diameter!), to the trash burner, and on and on. So, although I'm not in love with the colors, I feel like using them just because that's what he used...
 

kcassells

Fleet Admiral
Joined
Oct 16, 2012
Messages
8,598
Well I see a "FUN" project with a lot of history motivation. That's really a cool thing......just drives ya to do it so GranPa smiles. definitley have some work ahead of you.
Gm will be a great mentor for you and his thread is a great read for you. I'll bet he'll have you with a steering console in 10 seconds flat. Now that's styling!!
Time to start the demo. let the games begin. BTW the green not so bad. See how to duplicate it, you can get a chip analyised/matched. Or maybe everything doesn't have to be all that green and Pop might dig that too.
Thanks for the pics.
 

gm280

Supreme Mariner
Joined
Jun 26, 2011
Messages
14,591
MizeDog, obviously you have a lot of attachment to this boat. And I honestly can understand that as well. So the first thing you need to do is clean it out. Clean everything out of the hull in preparation to refurbish it back to its glory days.

Very first thing you need to be doing now is taking lots of pictures of everything. And I mean every angle, side, inside, outside...everything. Then take a lot of measurement as well. Draw or sketch a version of your boat on paper or a computer program and post those measurement on that drawing. Reason? You will be using both the pictures and measurements down the road as you rebuilt this boat.

It seem it is a combination of fiberglass and aluminum. So different things will take different approaches. Once you get it cleaned out, it will be time for demolition. And the amount of demolition will depend on how much rot you find doing investigation of the transom, floor and stringers. So post a cleaned out shot or three and let's get going. JMHO!
 

Woodonglass

Supreme Mariner
Joined
Dec 29, 2009
Messages
25,924
This ^^^ is GREAT advice!!!! Follow it!!! You won't believe how much you'll reference your pics and measurements as the project moves along. They WILL BE invaluable!!!
 

Mizedog

Cadet
Joined
Mar 8, 2016
Messages
10
Good morning all. I can't tell you how much I value your input. While I've played with fiberglass, and am a competent wood worker, I haven't touched resin and cloth in decades. I am a big proponent of pictures and plans and will take more time to document what is, so I can brainstorm what could be. To be honest, I'm hoping to get the hull and motor in shape for this season, and just be careful with the floor. Then, towards the end of summer (early here in Colorado), I will demo the floor. But, who knows. If I can gather enough know-how, and get a clear plan, I might pull out that floor right away.

Re: a steering console: I would love this, and could fab up something nice. I would just need to educate myself on the mechanics of the steering (cables like a bike shifter?).
Thanks all.
 

Johnboy82

Seaman Apprentice
Joined
Dec 20, 2015
Messages
43
Hey bud. Sounds like a great project. Love to see old boats have another chance and you have an excellent setup to begin with. I'm just starting on a rebuild restore myself and I wish I had all the storage you do. I'll follow along
 

Mizedog

Cadet
Joined
Mar 8, 2016
Messages
10
I'm waiting for my Dad's sand blaster to arrive. Then I'll tape off and strip all the aluminum and get it primed and repainted. This would include all the cabinets, gunwales, etc. I don't think I'll have to sand blast the interior fiberglass surfaces but may give it a try (advise?). I'm concerned about wearing away too much material. However, I'd like to know whether I need to lay a coat of resin over the surface as a sealer or not. I like the idea of getting all the paint off, and rolling on a coat of sealer. I have to re-educate myself on fiberglassing.

Cabinets -
Getting them out is required in order to get to the floor for replacement. They are attached by rivets to flanges which seem to be mostly riveted to the gunwales. I can drill out the rivets on the battery box and get that out pretty easily. Unfortunately, I'm not sure the long rod box will come out without removing the mounting flange too. I was hoping to leave the mounting flange in place so as not to stress out the hull. If I don't take out the cabinets this year, I might cut out a piece of pressure treated plywood to just lay over for this summer only.

Getting the cabinets out easily will really determine for me if I tackle replacing the floor this Spring, or wait until after the weather turns cold in the fall.


Weather trends here in Colorado is a little tricky. For the past several weeks we've experienced sun and temps in the 60's and even up to the 70's, always dry. That makes it feel like Spring is here, but we can't be fooled. The snow usually cranks up in late March, and is spotty, but heavy through April, sometimes into May. A favorite saying around here is "Don't plant your garden until after Mother's Day". It's hard to wait that long and I'll have to have a cover before then as the hale is brutal in May and June.

This week has been very full, and my band is providing music for a local church rally all weekend. I'll be back home this afternoon at which time I'll take a serious look at moving my wood working shop from the longer third garage bay to the shorter second bay so the boat can go into the third bay and be safe from the Spring snowy weather. That should get me more opportunity to work on it.

Trailer back story-
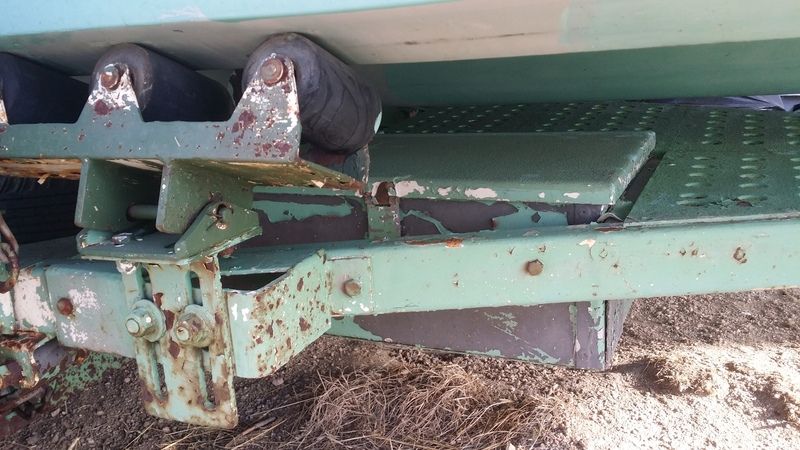
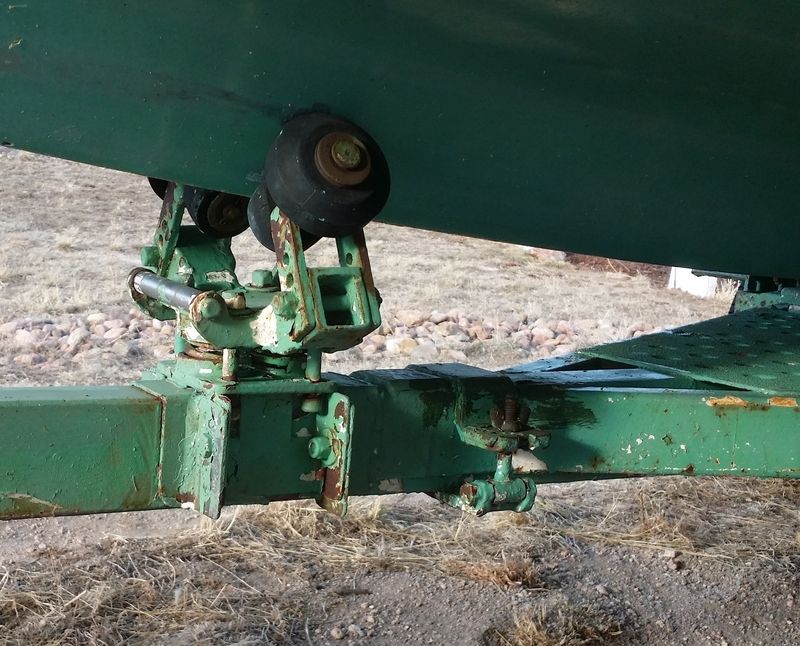
Not long after Grandpa bought the trailer, the axle decided to break loose while he was driving down the highway. It caused the whole package to go flipping down the shoulder of the road, which resulted in major breakage to the boat itself. I think that was probably the catalyst for building the cabinets, etc. So, Grandpa dove into structuralizing the trailer for more dependability. I believe the roller brackets are shop-made, and the trailer overall is pretty heavy for its size. The tongue folds, and I think may even extend. If not, it seems a little short to me and may induce sway. The fenders are probably .060 aluminum and can be used as steps. I do know that I need to get the boat off the trailer so I can sand blast, paint, and rewire the trailer. Any suggestions on paint? This will be for cold, fresh water use only.

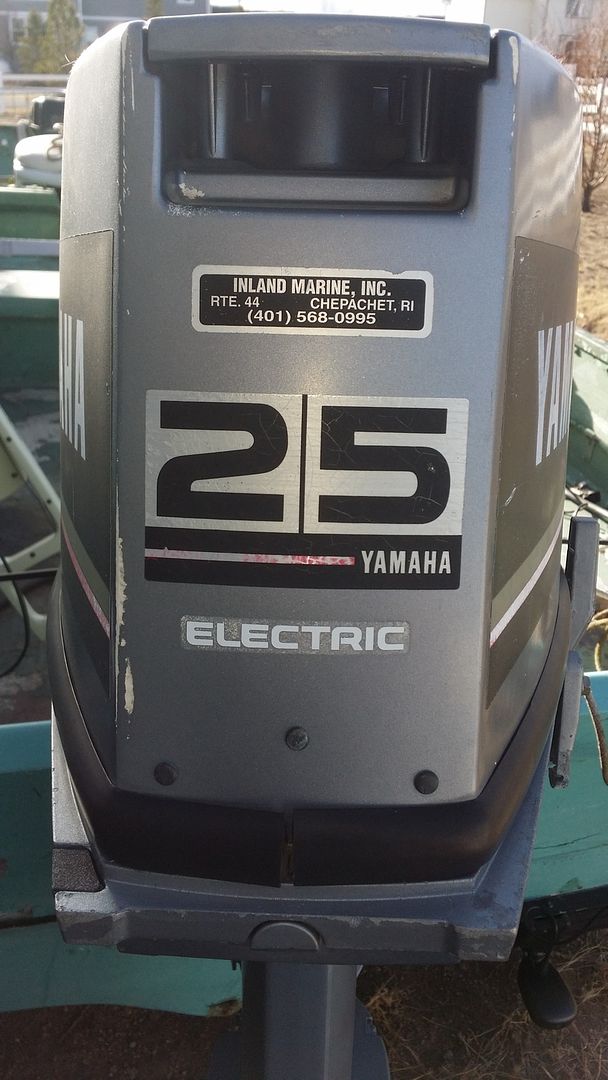
The motor appears to be a Yamaha 25 from the late 80s. I'm in the high plains near Colorado Springs (7000 feet above sea level), and I can't find any businesses locally that will service Yamahas. I did find a place in Canon City (near the famed Royal Gorge). Unfortunately, I may have to take time away from work to drive down there and drop off the motor. I'm surprised they aren't open on Saturdays... This makes me wonder if I should look into servicing it myself (rebuild the carb,replace lines and fluid, etc. I've worked on plenty of cars, but no boat motors.

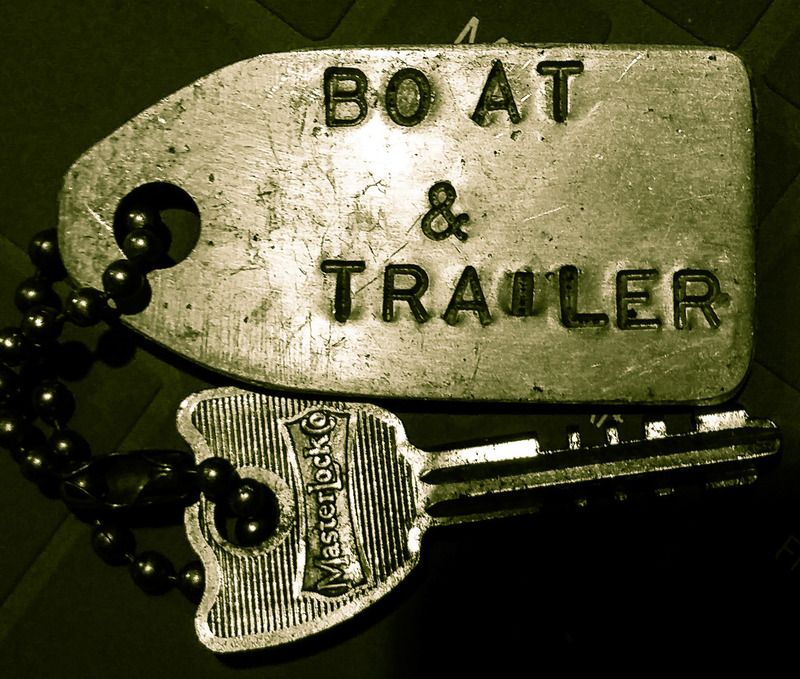
Here's a great example of Grandpa's tendency to organize and use metal. It's the original key fob he made from aluminum. I'll leave this at home and use a modern floater instead.
 
Last edited:

kcassells

Fleet Admiral
Joined
Oct 16, 2012
Messages
8,598
I think I would sand blast everything 1 time while you have the sand blaster.
 

gm280

Supreme Mariner
Joined
Jun 26, 2011
Messages
14,591
Mizedog, sand blasting will work okay for the aluminum, but I am not so sure about the fiberglass. So do a small test spot before going hog wild on the fiberglass. Better safe then sorry. As for the treated plywood, again I would not use PT wood in your boat. PT wood and aluminum don't work together at all. So forego PT woods. Instead use most any type exterior grade plywood. It won't effect the aluminum or fiberglass and being exterior glued, it won't delaminate either.

If you really want to remove the paint, get you an angle grinder and some good disks and go for it. But it removes things really quickly so go slow and easy. And I know you are talking about doing a partial rebuild now and some more later on. I would try to do everything now and even if it takes a little longer to finish, that will be the best option in my opinion. Just stating my opinion...for what it is worth!
 

sphelps

Supreme Mariner
Joined
Nov 16, 2011
Messages
11,432
Nice to see your bringing your grand fathers old boat back to life ! I'd like to tag along if there's room !
http://www.fiberglassics.com/library/File:Starcraftb65023.jpg
I agree with gm .. An angle grinder with the flap disk will work well ...
Make sure you wear a good respirator while grinding ... I would imagine the old train paint might not be real good for the lungs ... You may want to check it for lead ...
Good luck and let us know how we can help ...
 

NorthwestChap

Petty Officer 1st Class
Joined
Mar 7, 2011
Messages
224
Love the history Mizedog. That in itself is great motivation to get it done. Having the vision of your daughter's casting a line off the side will motivate you all the more. Looking forward to the progress.
 

Mizedog

Cadet
Joined
Mar 8, 2016
Messages
10
Thanks all for the info and encouragement. I know this isn't a high profile, high output speedster, but it should just fit in the garage, and should hold my family.

I too a few more pictures yesterday to reference. I have to admit, although I've fished out of this boat many times, I need to familiarize myself with the details, and identify options.

Motor:
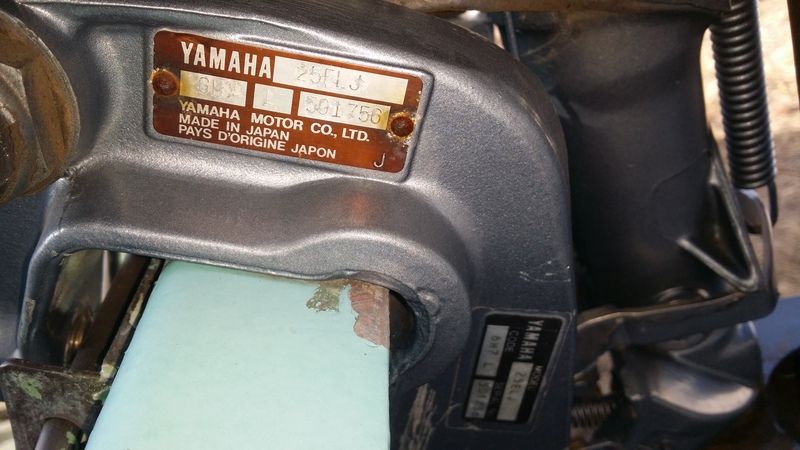
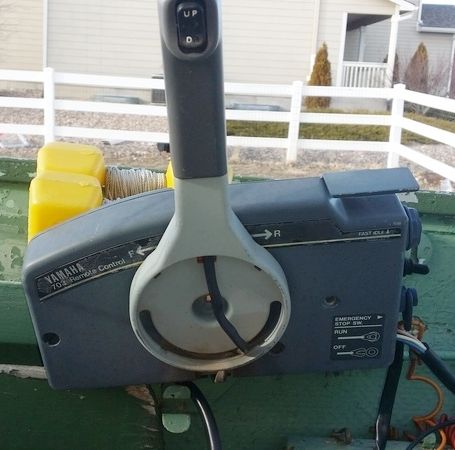
I needed to identify the year of the motor to verify the local shop would service it. It appears to be a Yamaha 25ELJ from 1986. The shop said they don't service any Yamahas older than 1985 so I may be luck. I'm also curious about how I might add a steering wheel, or even stick steering. It's not a necessity, especially with our relatively small lakes. Here are some pictures.


Model plate:


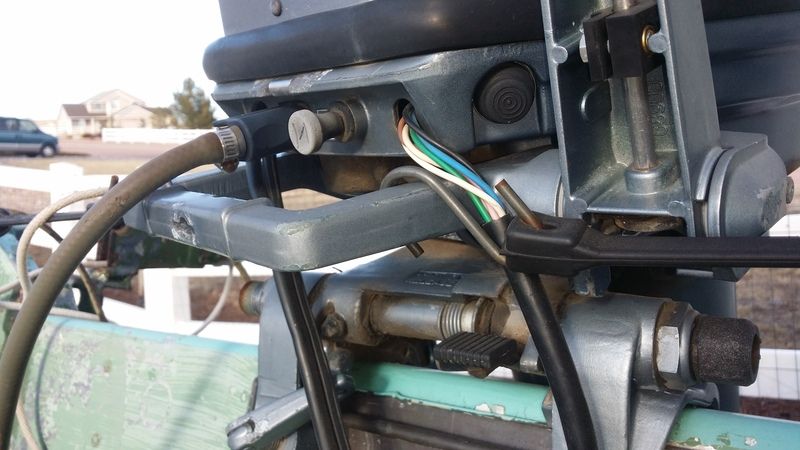
Front bottom shot of control interface, and tiller area:


Add on throttle:


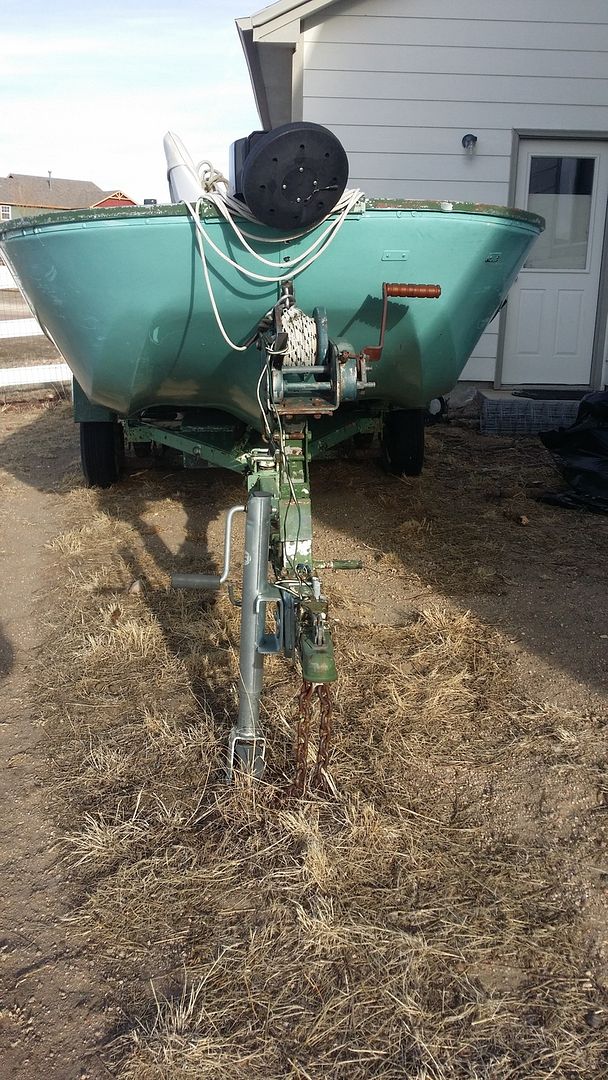
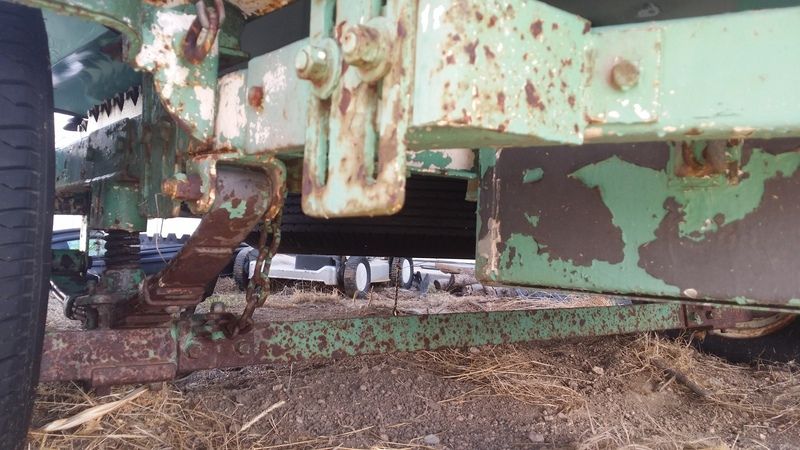
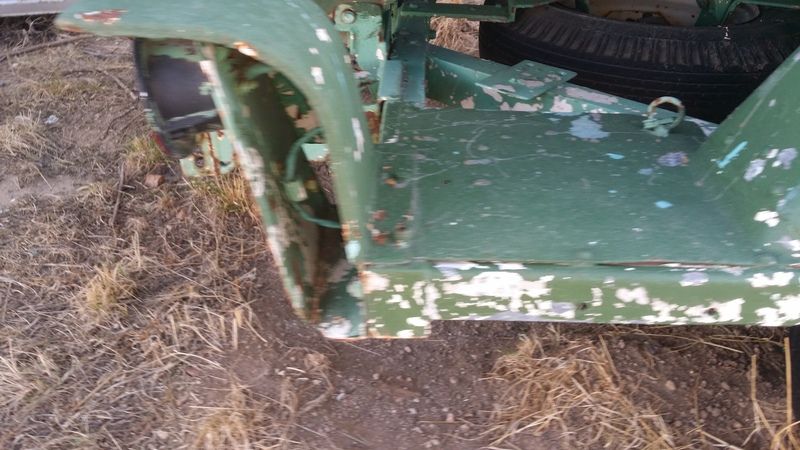
Here are some pictures of how the trailer. Again, my Grandpa had to rebuild this. You can see the storage box, and platform. The axle may have been partly his creation to make sure it would not liberate itself from the trailer again. I plan on sand blasting and repainting the whole trailer. I also need to educate myself on bearings. I know that bad/dry bearings are typical breakdowns and want to avoid that. I'll be towing the boat anywhere from 20 to 150 miles each trip and need to know it's not going to fry a bearing. The tires have very little mileage on them, but have been sitting in cold and sun for several years. I may replace them just for piece of mind.
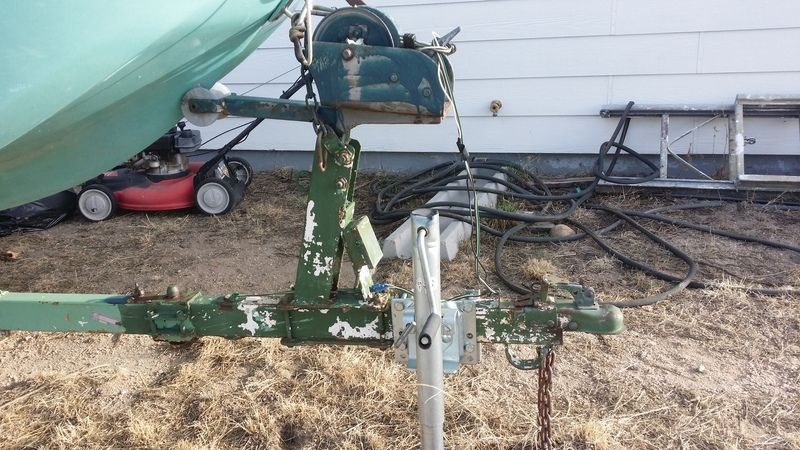
I mentioned earlier that the tongue breaks/ pivots to allow the boat to be offloaded in shallow water, or on the yard. I don't think it extends for better pulling. I've got to learn how it all works. Then, I need to perform and rewiring necessary. Warning - these are not exciting, and the trailer is generally pretty ugly.
As always, any guidance or suggestions would be appreciated.


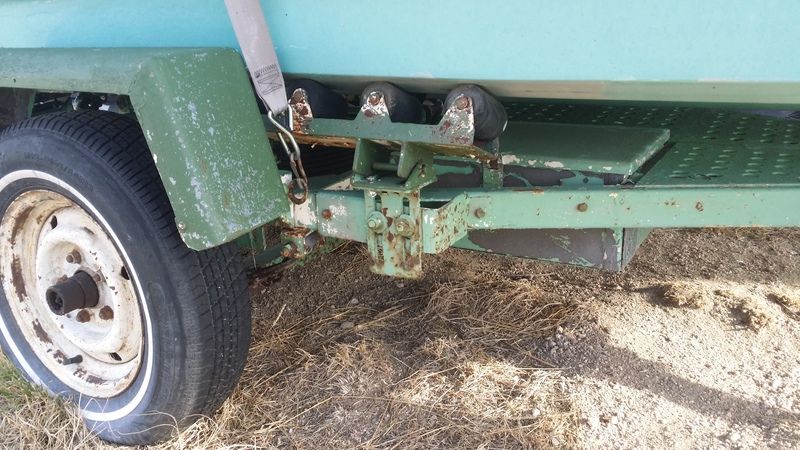
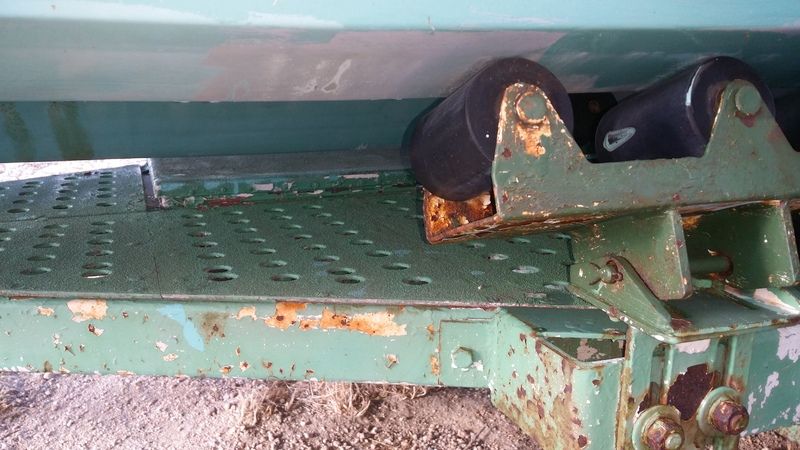
Grandpa's roller assembly. It's heavier than this boat needs but that was his style. The storage box is visible on this side as well.


My grandparents lived in northwestern Indiana where rust grows almost as well as the corn. Here's proof:


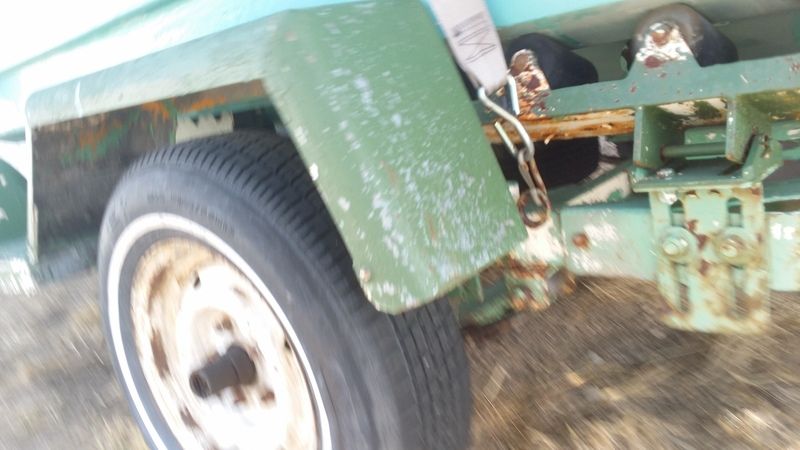
Aluminum fenders and... whitewalls! That probably was intended to match the white walls on all the big giant grandpa sedans he had (Chevy BelAirs, Impalas, big Buicks).


Step integrated into the back of the fender. Grandpa was a "fabricator" before that word was popular:


Port side platform and grandpa-fabbed roller:


Front roller with built in "suspension" and the tongue break. He used to dump the boat in the grass to work on the trailer all the time.


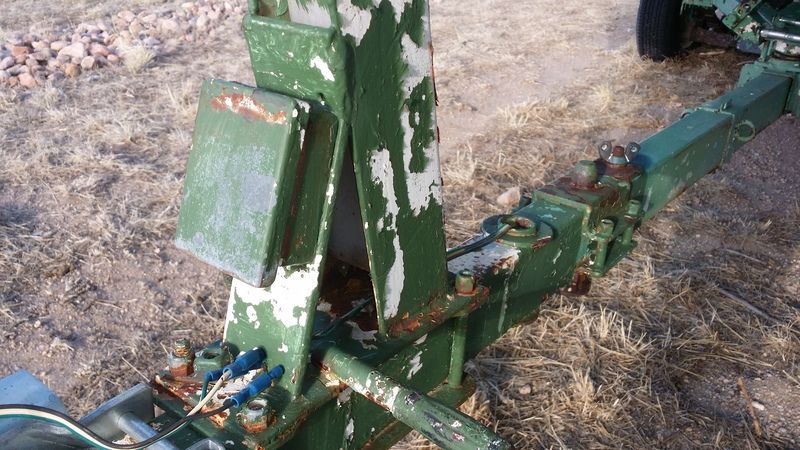
Front winch support showing his effort to strengthen the assembly.


I think after a long session with the sandblaster, and then some primer and paint, it will look much better. I have to admit, I'm looking at the aluminum and am tempted to put a polish on some of it. Grandpa would never have through of that since he wouldn't have wanted to draw attention to himself. So, the big concern for me on the trailer is lights, bearings and tires. The rest should be super solid with thick iron. Dad's looking for the sandblaster I bought him several years ago. Once he finds that, or I buy my own, the work begins in earnest.

I'm really looking forward to getting the girls (and my wife) out on Pueblo reservoir for some pan fish, wipers, walleye, and bass. I think that type of fishing would be more fun for them.
 
Last edited:

gm280

Supreme Mariner
Joined
Jun 26, 2011
Messages
14,591
Mizedog, I see some interesting things and some other things I would remove. I would remove everything that seriously isn't needed to trailer the boat properly. Weight doesn't equate strength. I would look for ways to turn this trailer either into a roller trailer, or a bunk type trailer, but not both. I would certainly remove the extras there and make the trailer solid and sound and then sandblast it and prime and paint. But that is just my opinion.
 

kcassells

Fleet Admiral
Joined
Oct 16, 2012
Messages
8,598
Concur with GM and sam, did some looking. Sandblasting glass tends to leave little pock marks. Does the job but too aggresive. Flapper disk on grinder for glass.
Looking good!
 
Top