Popular Mechanics 1962 PM38 Build [SPLASHED 2017]

pekstrom

Chief Petty Officer
Joined
Dec 31, 2015
Messages
490
Sharing ideas is what its all about, thanks for taking us along on your build!

Speaking of that, I like how you created those platforms for Miss Morgan. They turned out real nice. And now I know how to make them. I'll have to see if something like that would work on my boat. I have feeling it is a bit small for something like that, but who knows.
 

pekstrom

Chief Petty Officer
Joined
Dec 31, 2015
Messages
490
Great project and thread, Pekstrom. After messing about for several months my son and I are finally actualy making some progress on our little hydro build. Nothing like seeing a few sticks of wood begin to resemble a boat! You are much further along on a more complicated build but you must have had that feeling along the way. Funny thing is, now that we are under way in earnest, the stuff that stressed me out just thinking about tackling just kinda works itself out. Yeah, some stuff goes awry but we just either modify or start the step again.

Looking forward to seeing your work continue!

Thank you! You're absolutely right. It has been amazing to see all the pieces I have cut out actually take the shape of a boat. And it amazed me how easy it was to steam bend the chines and also the plywood in the bow. That's something that has always seemed a bit like magic to me. I'm guessing when you say hydro, you are building a hydroplane boat? Which one are you building? Do you have a build thread going here as well? It would be really neat to follow along.
 

pekstrom

Chief Petty Officer
Joined
Dec 31, 2015
Messages
490
If you do try glassing the bottom I would suggest working with small batches of epoxy at a time as it may require less than you think. Epoxy has a much longer pot life than polyester resin so you should have time to work through a number of small batches.

Yep, I will give this a try. I should get the cloth I ordered this week. I'm not ready to start that work yet, but once I get there I'll have what I need. I will keep your advice in mind. I like the thought of having a nice protective cover for the bottom. I did get the slow hardener so that should give me a bit more time to work with it.
 

Ned L

Commander
Joined
Sep 17, 2008
Messages
2,266
Sounds good. If you have worked with polyester resin but not epoxy resin yet you may find yourself thinking something like 'this is great, I've got lots of time to work with this stuff', which is another nice thing about epoxy (it doesn't 'kick over' like polyester.). It gives you nice working time to sort of fuss with it to get the coverage even and how you want it.
 

scoutabout

Lieutenant Commander
Joined
Oct 14, 2006
Messages
1,568
Thank you! You're absolutely right. It has been amazing to see all the pieces I have cut out actually take the shape of a boat. And it amazed me how easy it was to steam bend the chines and also the plywood in the bow. That's something that has always seemed a bit like magic to me. I'm guessing when you say hydro, you are building a hydroplane boat? Which one are you building? Do you have a build thread going here as well? It would be really neat to follow along.

Yep we are on here too. Trying to link now...

Anyway, those two precise jobs - bending the chines and sheeting the bow are my two newest worries. I'm going to be taking another real close look at your steamin activities soon!)
 

pekstrom

Chief Petty Officer
Joined
Dec 31, 2015
Messages
490
Yep, I'm still here and yes I am still working on the boat. The problem is that while I am doing stuff to it, it is mostly preparing the inside for the epoxy coat. So mostly spackling, wood-filling, sanding, that sort of stuff. So it doesn't seem like there's much happening. I did cut out the stem band and have attached it. So the bow looks better now. I have also gotten the cloth for the bottom, and also some 2" wide cloth tape for joints and edges. So hopefully soon I'll start working with the epoxy to finish off the inside. I am planning to attach the spray rails tomorrow so we will see how that goes.
 

pekstrom

Chief Petty Officer
Joined
Dec 31, 2015
Messages
490
No Title

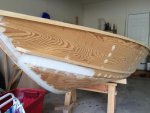
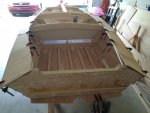
Today I did get the spray rails installed, with the help of my son. I did also sand down the stem band so the sheer rails fit nicely in the bow. I was able to glue down the sheer rails as well. So getting closer to the epoxy treatment of the insides. Did get to do some sanding as well so it is starting to look pretty good now. I did cut out the aft and mid deck sections. In the second picture they are held in place by clamps. I may attach them before I do the epoxy treatment... I haven't decided yet. So made some good progress today...
 

Attachments

  • photo248450.jpg
    photo248450.jpg
    67.5 KB · Views: 1
  • photo248451.jpg
    photo248451.jpg
    89.5 KB · Views: 1

scoutabout

Lieutenant Commander
Joined
Oct 14, 2006
Messages
1,568
Looking great pekstrom! I really like the lines of this boat - especially the slope to the gunwales.

By the way, what are using as filler on the sides there. Going to need some of that myself soon methinks!
 

Woodonglass

Supreme Mariner
Joined
Dec 29, 2009
Messages
25,924
You can use epoxy thickened with Fine Wood powder to use as a filler. Get the powder from your R/O sander collection bag and mix enuf to make it like Mayonaise. Sand the area to be filled and wash down with Acetone prior to filling.
 

gm280

Supreme Mariner
Joined
Jun 26, 2011
Messages
14,591
I have to admit, I haven't visited your thread in a while. But wow, nice work. It makes me think about something like that now. I will visit more often and see the results. You do good work. :thumb: :thumb:
 

pekstrom

Chief Petty Officer
Joined
Dec 31, 2015
Messages
490
Thanks everyone for the kind words of encouragement. They are much appreciated.

The white stuff on the sides is just spackle. I have to admit I haven't put much effort into the selection so I just went with an interior/exterior type from the local hardware store. I kinda figure it will be covered with epoxy, cloth and paint so it should be ok. I have used some of the Titebond III mixed with sawdust to fill in the bigger things I needed to fix. That has worked very well. Now that I have epoxy I may try some of that as well if I need to.

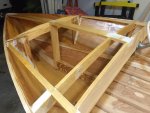
Speaking of epoxy, I have finally gotten to cover the insides in front of the dashboard with a coat of epoxy. It looks pretty nice. I had checked the weather and there was no rain in the forecast. But of course, when I was almost done, it started pouring and thundering. Hopefully it will be ok. I closed the garage door so no rain should get on the coated surfaces. I guess I'll have to wait and see.
 

Woodonglass

Supreme Mariner
Joined
Dec 29, 2009
Messages
25,924
You'll need to apply a coat or two of Spar varnish over the epoxy on the dash to give her some UV protection.
 

pekstrom

Chief Petty Officer
Joined
Dec 31, 2015
Messages
490
No Title

Pictures! Pictures! 😀

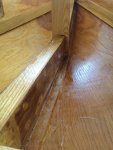
Here ya go. It isn't much to look at yet but you can tell that the stuff from the dash forward is darker than the rest. It has hardened nicely too.
 

Attachments

  • photo248855.jpg
    photo248855.jpg
    136 KB · Views: 0

pekstrom

Chief Petty Officer
Joined
Dec 31, 2015
Messages
490
You'll need to apply a coat or two of Spar varnish over the epoxy on the dash to give her some UV protection.

The plan is to paint over everything. I'm not much or a wood worker so I don't think it looks good enough to just varnish over it and show my goofs. :lol:

Not sure if I have shared this plan yet, but basically I'm thinking of using a bildge paint in front under the foredeck and also below the chines in the rest of the boat. Then, on the outside, we are thinking an eggshell type white antifouling bottom, a royal navy blue on the sides between the spray and sheer rails. And then an offwhite top paint. For the inside I'm thinking of just continuing with the offwhite top paint and then royal navy on the dash and seats. And of course use marine paints so they should provide a nice UV protection for the epoxy.
 

jbcurt00

Moderator
Staff member
Joined
Oct 25, 2011
Messages
24,863
Unless you plan to leave the boat in the water for more then a couple of days/long weekend, you dont 'need' anti-fouling paint.

Otherwise, sounds like a good paint plan.

The paint link in WOGs signature includes using an added catalyst hardener that improves gloss, hardness and drying/curing time of enamel paints. Similar to 2stage catalyzed (expensive) paints.
 

pekstrom

Chief Petty Officer
Joined
Dec 31, 2015
Messages
490
No Title

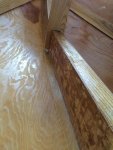
So I decided to use the 10 feet of 2" wide 9oz cloth strip to practice laying it in epoxy while I can do it in an area that won't be all that visible later. So I laid a strip on either side of the keelson. I can see I probably should have cut a few slits in it so it would have followed the curve of the bow better. But all in all I'm quite happy with it considering it is my first time doing this.
 

Attachments

  • photo248878.jpg
    photo248878.jpg
    76.8 KB · Views: 1
  • photo248879.jpg
    photo248879.jpg
    71.7 KB · Views: 1

Woodonglass

Supreme Mariner
Joined
Dec 29, 2009
Messages
25,924
Did you coat the wood first and then laid the glass on top of the wet surface? If not make sure in the future to always wet the wood first and let it set for a while to ensure the wood is saturated. If not it will pull the resin out of the cloth and you'll have DRY spots in your layup. From what I can see your layup looks pretty darn good.
 
Top