1981 Rinker V170 I/O interior sidewall rebuild- any advice?

1lastweekend

Seaman
Joined
Nov 7, 2015
Messages
52
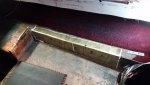
This fall I decided to replace the worn interior of my 81 Rinker. I removed the seats and some of the carpet and then removed the interior vinyl/plywood sidewalls to make templates for the new pieces. I found some rotten wood under the fiberglass sidewall structures (not sure what the right name is for this area!) and removed most of it, but the area in red is rotten and will have to come out. I plan to cut out the area with a sawzall or vibratory cutter, then insert new plywood and glass it over. I have never done glass work before, but have been doing some net research on how to perform. The rear of the floor on the boat is open so I checked the stringers, they appear to be solid and not rotten. The motor mounts and transom are also in great shape. The floor itself is also solid. Any advice or tips on how to perform this repair is really appreciated! Here are some pics I took:
sidewall smaller 1.jpg Sidewall smaller 2.jpg

Interior smaller 1.jpg interior smaller 2.jpg
 

levi_tsk

Ensign
Joined
Dec 26, 2010
Messages
907
Look for lightweight pvc board - you sand it lightly with 80 grit and fiberglass over top of it. It's easy to shape and cut takes a screw just like plywood and will NEVER rot.
Plywood is OK if its marine grade but marine grade ply is $250+ per 3/4" sheet and lightweight PVC board is around $100 per sheet.
There's another material called plascore its like nidacore but the cells are smaller and thus its stronger and flexes less. It's about $75/sheet but you have to paint the scrims with a light coat of resin and then fiberglass both sides to see its full potential. Not really a beginner material but WICKED STRONG and simple once you get the hang of it.
 
Last edited:

1lastweekend

Seaman
Joined
Nov 7, 2015
Messages
52
Thanks for the advice- didn't realize I had so many options for the rebuild! I have some leftover 3/4" marine grade plywood from building a new engine doghouse a couple years ago, so i will use that up for this project. Should I treat or coat the plywood with anything first like polyurethane, or is it OK to go as is since it's marine grade?
 

jbcurt00

Moderator
Staff member
Joined
Oct 25, 2011
Messages
24,869
I'd suggest that the rotten area you highlighted in red is likely to have let water get below decks and this may be a more involved repair then you expect.

polyurethane has no place on the plywood structure of a fiberglass boat. Perhaps you have polyester resin and polyurethane mixed up

Properly prepped exterior grade plywood, wrapped on all edges and sides w/ CSM fiberglass and polyester resin then tabbed into place on the hull will last significantly longer then you plan to own this boat. But the areas you'll be glassing to will also need some prep work, likely beyond the exposed area at the red box you highlighted.

Exotic materials and hard to get right processes aren't necessary. Regular maintenance and properly storing a covered boat are and will keep most boats water ready and safe to use regardless of build materials.

There are lots of guys hanging out in the iboats dry dock area. They will be along to help you get this back in shape and ready for use this season.

Welcome to iboats and boat rehab
 

1lastweekend

Seaman
Joined
Nov 7, 2015
Messages
52
You were right jbcurt00- when I cut into the remains of the fiberglass, the rotten wood underneath extended about 6 feet, which is 3 feet further than I had expected. I was able to look at the stringers from the removed hatch for the gas tank access and the portions I could see look solid. Is there another way to check below the floor to make sure there isn't further damage as you mentioned?

I was talking about a product like helmsman spar polyurethane- I have used it on the wood for some bow seats I have built in the past and it has stood up to the weather very well. I will make sure not to treat the marine grade plywood I use for this repair- just sand it and then fiberglass it. What is the technique "tabbing" that you talked about? Thanks!
 

1lastweekend

Seaman
Joined
Nov 7, 2015
Messages
52
Today I used the sawzall to cut away the rotten sections of fiberglass/plywood and this exposed the foam underneath. The foam must be some type of open-cell foam used in 1981 that absorbs water, because as I pulled it out, water came gushing out of it. The fiberglass below looks solid and whole, which makes me feel a lot better about the condition of the stringers below. The water literally sits in the pocket like a bathtub! So any advice on what type of foam to use to refill the void once I craft the plywood for the repair? Thanks!
foam resize 1.jpg
 

ondarvr

Supreme Mariner
Joined
Apr 6, 2005
Messages
11,527
There has never been any open cell foam used for floatation, normal closed cell foam breaks down over time and begins to take on the same characteristics as open cell foam though.
 

1lastweekend

Seaman
Joined
Nov 7, 2015
Messages
52
There has never been any open cell foam used for floatation, normal closed cell foam breaks down over time and begins to take on the same characteristics as open cell foam though.

Thanks, I wasn't sure why it had absorbed the water. I have gotten all of the wet stuff out, any recommendations on what to replace it with?
 

1lastweekend

Seaman
Joined
Nov 7, 2015
Messages
52
No Title

Ok so I was busy with other stuff around the house, and just got back to working on the boat this week. I made new side panels from marine plywood and set them in place with some marine epoxy and liquid nails. I have added in some closed cell poly foam inside the larger side, and then place the top piece over it once it set up. After this cures in my garage for a couple of days I am going to start glassing over the wood. Any tips on the fiberglassing? I bought a repair kit and some extra cloth, and have read the instructions and watched some Youtube videos- I think I am as ready as I will ever be...

20151122_185443.jpg
20151122_151005.jpg
 

Attachments

  • photo234509.jpg
    photo234509.jpg
    136.5 KB · Views: 0
Last edited:

1lastweekend

Seaman
Joined
Nov 7, 2015
Messages
52
Happy Thanksgiving! Today was over 60 degrees in upstate New York so I went ahead and fiberglassed over the panels...Never done this before but I think it came out pretty good. I put two layers of cloth on and once it's dry I will start sanding the old glue and carpet remnants off for the new carpet install.

Not sure why but I am not getting any responses to some of the recent questions I asked in my posts on here, so I will just continue to post my progress for anyone who might be interested in seeing it. Thanks!
005.jpg 006.jpg
 

1lastweekend

Seaman
Joined
Nov 7, 2015
Messages
52
Another warm weekend, over 50 degrees so I got the floor prepped and installed the carpet. Wasn't as hard as I thought, but took me about an hour to get it all down and smoothed out. Next is to replace the side panels with the new ones I have made...Almost done, but do need to winterize the engine... 20151205_163640.jpg
 

Bayou Dave

Lieutenant Commander
Joined
Dec 13, 2012
Messages
1,780
An hour to lay the carpet is not bad at all. What did you use to glue it down?
 
Top