Hello everyone,
Great site and lots of good advice. I recently bought an 87 Bluefin 17' that has been stripped to the bare hull, with the intention of building a ground up boat to my liking. Although I am a newbie on this major undertaking, the good news is my brother (Lmuss53) has done one complete refurbishment and several partials. The bad news here (you had to know that was coming) is he lives 150 miles away so there will be very little "hands on" assistance.
I have rigged several boats, installed removable floors in my SeaNymph 14R and fabricated plenty of equipment. My weak area is welding although I intend to learn that this winter, primarily AC TIG welding for aluminum fabrication. My vocation before retirement was power plant rotating machinery repairs and machining. I am retired but continue to work as a consultant.
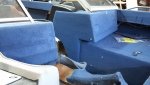
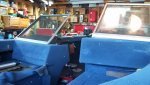
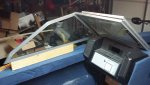
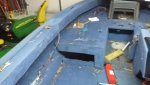
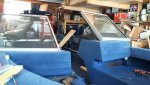
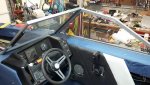
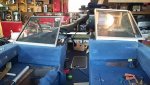
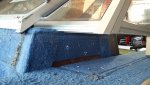
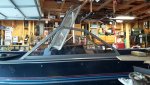
Since purchasing the "kit boat" as we are calling it, I just bought an 88 Bluefin Sportsman 1700 with a 94 Merc 60 HP 2 stroke motor. The original owner had this boat for 26 years (88 thru 14) he passed away and his neighbor bought and used it for a year and was informed it was too small and he needed to buy a pontoon. I bought the boat from this gentleman. Although the boat is structurally sound, it is tired, dated and has need of some general upgrades. This boat is 80% of the way I wanted to configure mine. The major problem is the casting deck area in front of the consoles is damaged and soft where the original owner attempted to reconfigure the live well and casting deck area. This will work to my advantage as I want seats in front of the consoles and no casting deck. Live well may become dry storage. The floors themselves are solid but I’m going to lift an area to check for wet foam.
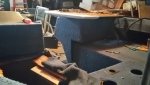
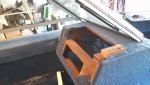
First question- I found white Styrofoam inside the boxed in gunwales. Could this be the only flotation? I found the floor foam was as much support for the floor as flotation. Can I expect both? Styrofoam and expanding foam?
Anyway, this will be a WIP thread explaining upgrades I will be making over the next few months. Until the NE Ahia lakes freeze over I intend to continue using this boat. This will be a work in process and not a full blown rebuild. Although that may still come to fruition with the ’87.
I will make a list of the changes I intend to make and keep you advised.
I thank you all in advance for your help and patience.
Chasmo
Great site and lots of good advice. I recently bought an 87 Bluefin 17' that has been stripped to the bare hull, with the intention of building a ground up boat to my liking. Although I am a newbie on this major undertaking, the good news is my brother (Lmuss53) has done one complete refurbishment and several partials. The bad news here (you had to know that was coming) is he lives 150 miles away so there will be very little "hands on" assistance.
I have rigged several boats, installed removable floors in my SeaNymph 14R and fabricated plenty of equipment. My weak area is welding although I intend to learn that this winter, primarily AC TIG welding for aluminum fabrication. My vocation before retirement was power plant rotating machinery repairs and machining. I am retired but continue to work as a consultant.
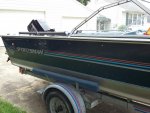
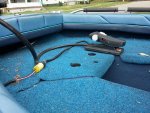
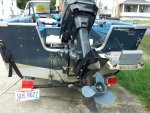
Since purchasing the "kit boat" as we are calling it, I just bought an 88 Bluefin Sportsman 1700 with a 94 Merc 60 HP 2 stroke motor. The original owner had this boat for 26 years (88 thru 14) he passed away and his neighbor bought and used it for a year and was informed it was too small and he needed to buy a pontoon. I bought the boat from this gentleman. Although the boat is structurally sound, it is tired, dated and has need of some general upgrades. This boat is 80% of the way I wanted to configure mine. The major problem is the casting deck area in front of the consoles is damaged and soft where the original owner attempted to reconfigure the live well and casting deck area. This will work to my advantage as I want seats in front of the consoles and no casting deck. Live well may become dry storage. The floors themselves are solid but I’m going to lift an area to check for wet foam.
First question- I found white Styrofoam inside the boxed in gunwales. Could this be the only flotation? I found the floor foam was as much support for the floor as flotation. Can I expect both? Styrofoam and expanding foam?
Anyway, this will be a WIP thread explaining upgrades I will be making over the next few months. Until the NE Ahia lakes freeze over I intend to continue using this boat. This will be a work in process and not a full blown rebuild. Although that may still come to fruition with the ’87.
I will make a list of the changes I intend to make and keep you advised.
I thank you all in advance for your help and patience.
Chasmo
Last edited: