When I looked at it last night it looked like it tapered top to bottom in the sides but it musta been an optical illusion as I don't even see it in the pics now.
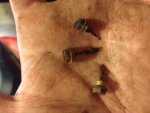
All those screws

poor wood never stood a chance.
I think you and WM have the best plan of attack to clean it out
The speedo should be a tube and not any big deal to cut and splice back with a vacuum T but the transducer seems to depend on how good you think you can
splice it. In the end though you may want to think about just pulling them all the way out to rerun them. I have no room to talk though as on the Jet I the ducer cable through the SW drain also.
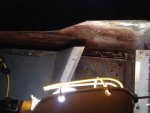
Looking at the pocket where the wood was makes me wonder if anyone has done/documented a seacast transom on a tinny. I see on their website


 .
.


