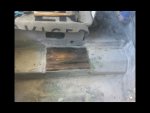
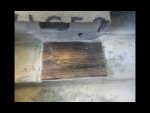
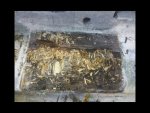
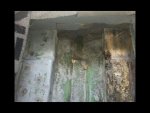
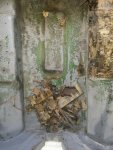
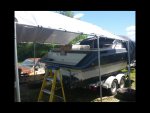
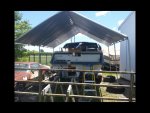
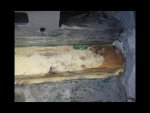
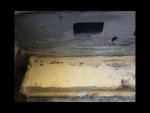
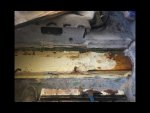
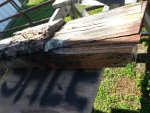
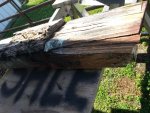
take a look. Engine mount... how can I be efficient?

kramerpage

Chief Petty Officer
Joined
Jul 26, 2010
Messages
447
This removal is going super slow. I cut the entire perimeter with disk to wood. Beat it with a sledge. Then cut off just small box at Mount. This stuff is tough as nails. Many nails and 3 inch long staples. Staples are rigid. Nails are also. I'm just picking at it slowly with claw on 16 oz frame hammer. It will be October by the time I get both sides removed. Can somebody share a method cause mine stinks. Thank you.
 

Attachments

  • photo226858.jpg
    photo226858.jpg
    137.3 KB · Views: 0
  • photo226859.jpg
    photo226859.jpg
    137.5 KB · Views: 0
  • photo226860.jpg
    photo226860.jpg
    180.1 KB · Views: 0

jbcurt00

Moderator
Staff member
Joined
Oct 25, 2011
Messages
24,863
More info and better pix would help.

Why are you removing motor mount?
 

kramerpage

Chief Petty Officer
Joined
Jul 26, 2010
Messages
447
Anyone? Sawzall into chunks maybe? Kinda afraid of going thru bottom. Too many staples for circular saw. Tried wonder bar and 3 # sledge. Slow going. It's like it's all one timber but it's not. Thanks for any help guys. I've never done this.
 

DeepBlue2010

Lieutenant
Joined
Aug 19, 2010
Messages
1,304
If I am seeing these pictures correctly, you are trying to "carve out" the middle piece of a long log. The rest of the engine mount is hiding under the rectangle area of glass. Why are you digging out this specific piece? If the mount is gone (rotted) the rest of it needs to be replaced as well. What are you trying to do?


And by the way, if you will continue carving out this piece, use carving tools (chap chisels )
 
Last edited:

Scott Danforth

Grumpy Vintage Moderator still playing with boats
Staff member
Joined
Jul 23, 2011
Messages
47,499
Agreed, whole mount needs to come out (all of it). Then you will check the stringers and may have to remove them and the floatation boxes as well.

Take measurements because the starboard side block has a recess for your starter.

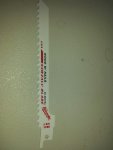
The usual tools of destruction are sawzalls, 4.5" grinders with carbide saw blades, multi tools with a variety of blades.
 
Last edited:

kramerpage

Chief Petty Officer
Joined
Jul 26, 2010
Messages
447
No Title

Agreed, whole mount needs to come out (all of it). Then you will check the stringers and may have to remove them and the floatation boxes as well.

Take measurements because the starboard side block has a recess for your starter.

The usual tools of destruction are sawzalls, 4.5" grinders with carbide saw blades, multi tools with a variety of blades.

Wow your right Scott. Geee Whiz I mise that with the starter side. I was gonna remove one side and build it like the other. I now see that would have been incorrect. Thanks. They are actually inverted at the transom. I haven't dug into that yet so I will get pad and pencil. Thanks guy. I have alot of different tools. Some I haven't even unbound yet. I'm thinking sawzaw. ......Someday many nails and staples it's off the hook. Thanks for wisdom I almost made a major screw up....
 

Attachments

  • photo226935.jpg
    photo226935.jpg
    186.6 KB · Views: 0
  • photo226936.jpg
    photo226936.jpg
    178.5 KB · Views: 0
  • photo226937.jpg
    photo226937.jpg
    152.6 KB · Views: 0
  • photo226938.jpg
    photo226938.jpg
    192.7 KB · Views: 0

Scott Danforth

Grumpy Vintage Moderator still playing with boats
Staff member
Joined
Jul 23, 2011
Messages
47,499
My restored started as a bit of staining on the fiberglass covering my mounts. Nothing rotted, however transom, stringers and bulkhead were wet. So a fair amount of cutting, grinding, and itching later and the boatbwas back on the water
 

kramerpage

Chief Petty Officer
Joined
Jul 26, 2010
Messages
447
If I am seeing these pictures correctly, you are trying to "carve out" the middle piece of a long log. The rest of the engine mount is hiding under the rectangle area of glass. Why are you digging out this specific piece? If the mount is gone (rotted) the rest of it needs to be replaced as well. What are you trying to do?


And by the way, if you will continue carving out this piece, use carving tools (chap chisels )

Deep blue I responded to you earlier but it didn't post. Hot out here lol. Yes I'm doing entire piece 3 ft long transom to bulkhead. Both sides. One at a time. I have cs and 1708 or whatever woodonglasses told me to get. We had 37 days of rain here so I rebuilt the alpha drive totally and now I set up camp. I'm gonna cs both battery decks. I have made over 55 core samples as instructed by the guys. Transom is good. Stringers are good. Engine decks I don't know cause I can't get to them. I drilled holes on exterior to check transom in those hidden areas. Guess I will know more as I progress. Thanks for your help guy. Getting back on it. I have 4 days off and this is all I'm gonna be doing.
 

kramerpage

Chief Petty Officer
Joined
Jul 26, 2010
Messages
447
If I am seeing these pictures correctly, you are trying to "carve out" the middle piece of a long log. The rest of the engine mount is hiding under the rectangle area of glass. Why are you digging out this specific piece? If the mount is gone (rotted) the rest of it needs to be replaced as well. What are you trying to do?


And by the way, if you will continue carving out this piece, use carving tools (chap chisels )

I'm doing the whole 3 foot long piece. From transom to bulkhead. I just picked the center to get started. I have cut the glass all the way around the 3 ft beam. I couldn't get it to budge so I started making smaller areas. That's why I'm posting the question. Sorry the pics a not good but u have to reduce em so much or the site rejects them. I'll try to put up more pics. Sure ain't as rotted as we thought but the guys on here insisted to do it right and that's what I'm trying to do by following there instructions. I'm a mechanical engineer not a boat craftsman. Lol thanks guys. Steel 2 inch wood chisel in hand....
 

kramerpage

Chief Petty Officer
Joined
Jul 26, 2010
Messages
447
No Title

Sawzaw is working fine now. Getting somewhere. Hey I'm 55 years old on a smartphone give me a break....
 

Attachments

  • photo226941.jpg
    photo226941.jpg
    93.6 KB · Views: 0
  • photo226951.jpg
    photo226951.jpg
    246.5 KB · Views: 0
  • photo226952.jpg
    photo226952.jpg
    231.5 KB · Views: 0

kramerpage

Chief Petty Officer
Joined
Jul 26, 2010
Messages
447
No Title

Guys. Do I remove the foam?
 

Attachments

  • photo226954.jpg
    photo226954.jpg
    150.2 KB · Views: 0
  • photo226955.jpg
    photo226955.jpg
    117.8 KB · Views: 0
  • photo226956.jpg
    photo226956.jpg
    143.1 KB · Views: 0

Scott Danforth

Grumpy Vintage Moderator still playing with boats
Staff member
Joined
Jul 23, 2011
Messages
47,499
If the foam is wet, it has to go. If the wood is wet, it has to go as well
 

kramerpage

Chief Petty Officer
Joined
Jul 26, 2010
Messages
447
If the foam is wet, it has to go. If the wood is wet, it has to go as well[/QUOTE

The foam is bone dry...the stringer next to it is yellow wood and dry. Hip hip hurray!!!!

I'm guessing it's just a leveling compound. Thanks Scott.
 

kramerpage

Chief Petty Officer
Joined
Jul 26, 2010
Messages
447
No Title

Guys do I have to use foam? The other side was wet so I removed it as Scott said. I'm itching bad. Lol
 

Attachments

  • photo227040.jpg
    photo227040.jpg
    129.7 KB · Views: 0
  • photo227041.jpg
    photo227041.jpg
    315.6 KB · Views: 0

DeepBlue2010

Lieutenant
Joined
Aug 19, 2010
Messages
1,304
I am not sure I see clearly where the wood ends and the foam starts in your pictures. In any event, technically you as a boat owner don’t have to use foam. Factories have to use a calculated amount of foam in boats under certain length to comply with US Coast guard rules and regulations.

In general, foam is used to provide flotation (keep the boat from completely submerged under water) and/or to provide a form (shape) to fiberglass on.
In your project, I am guessing for cost cutting reasons and/or to meet the minimum amount of foam required, they decided against using all wood under this rectangle.. Instead, they used wood under the engine mount and filled the rest with pre-shaped piece of foam and fiberglassed over both to form that rectangle engine mounting platform.

If I were in your position, and this is just me, I would not repeat this design. I would feel more comfortable with wood all over that rectangle. With that said, obviously nothing wrong with the design, it served the boat well all these years.
 

kramerpage

Chief Petty Officer
Joined
Jul 26, 2010
Messages
447
No Title

Thanks DB,
I could make ply strips and fill it in and bed it with a faring compound. That's a lot of strips. Or I could just put one support down the middle length ways. The foam provided stability to the three sided frame with he long side resting on the hull and the other long side had a 4 5/8 inch rise stapled to it.
Its made out of one inch ply. I m going to use 5/8 and 1/2 lamented together which is one inch actual. I like that I have an actual template to work with.

Any suggestions would be great for construction.


motor mount.jpg
 

Attachments

  • photo227109.jpg
    photo227109.jpg
    124.2 KB · Views: 0

Scott Danforth

Grumpy Vintage Moderator still playing with boats
Staff member
Joined
Jul 23, 2011
Messages
47,499
I would get a bunch of plywood, titebond 3, and some large c-clamps. make a beam out of plywood by sandwiching the titebond between each piece. after a few days drying, then true it up on the table saw. cut the angles on the miter saw, and glass it in.
 

kramerpage

Chief Petty Officer
Joined
Jul 26, 2010
Messages
447
Scott I think that's the best way. I have a gallon of titebong 3 green. I checked on a 2 part foam system and it's 90 bucks for 2 gallon kit.
My big obstacle now is sanding. I'm trying to research a sander that really removes material. I have no air compressor at the build site big enuf for da so I gotta go electric. I have been using a belt sander with 18 and 36 grit to move material but I've done all I can do with it. I need something more compact but can move material. Looked at 5 inch Dewalt and porter cable da but the most aggressive pads are 40 grit. Will that work. The old glass is almost quarter inch thick. Everything needs sanding including the right and left decks so it can all be covered in CS and then gelcoated. Any suggestions for a sander? Thanks for your mentorship...
 

DeepBlue2010

Lieutenant
Joined
Aug 19, 2010
Messages
1,304
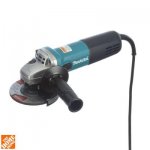
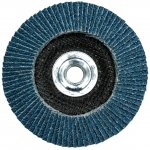
Use an angel grinder and 36 grit flap disk. Don't remove the guard from the angle grinder (the half circle metal plate under the rotating disk) no matter how tempting it would seems. Also, don't forget to put on a full set of Personal Protection Equipment including lather gloves. If you did not use one of these before on fiberglass, go easy in the beginning until you get the hang of it. These disks will eat through the fiberglass faster than you might think d1420926-5643-4c58-b1f0-d1c53b8dd87e_400.jpg
71xAIQunHPL._SL1001_.jpg
 
Last edited:
Top